AI Call Flow Configuration Guide for Businesses
Turn your business logic into a live, intelligent call system, no code required. A step-by-step guide to inbound and outbound AI call flow configuration.

Most businesses lose leads not because their product is wrong, but because the follow-up is slow, inconsistent, or completely absent after hours. AI call flows solve this at the infrastructure level, turning your conversation strategy into a deployed, autonomous system that works around the clock.
Navigating to Call Flows in Audiva
Log in to your Audiva dashboard and locate the left-hand navigation panel. You'll see a full suite of tools: Agents, Voices, Contacts, SMS, Emails, Campaigns, Bookings, Call Logs, Transcripts, Analytics, and more.

Step 1: The Call Flows Overview
Each agent has its own inbound and outbound flows, shown here for the “Ella Heavens” agent. The Call Flows page is organized around your AI agents. Each agent (for example, "Ella Heavens") has two distinct flow types shown side by side: an Inbound Call Flow and an Outbound Call Flow. Both display their current configuration status: how many nodes are set up, and whether the flow is currently Active.
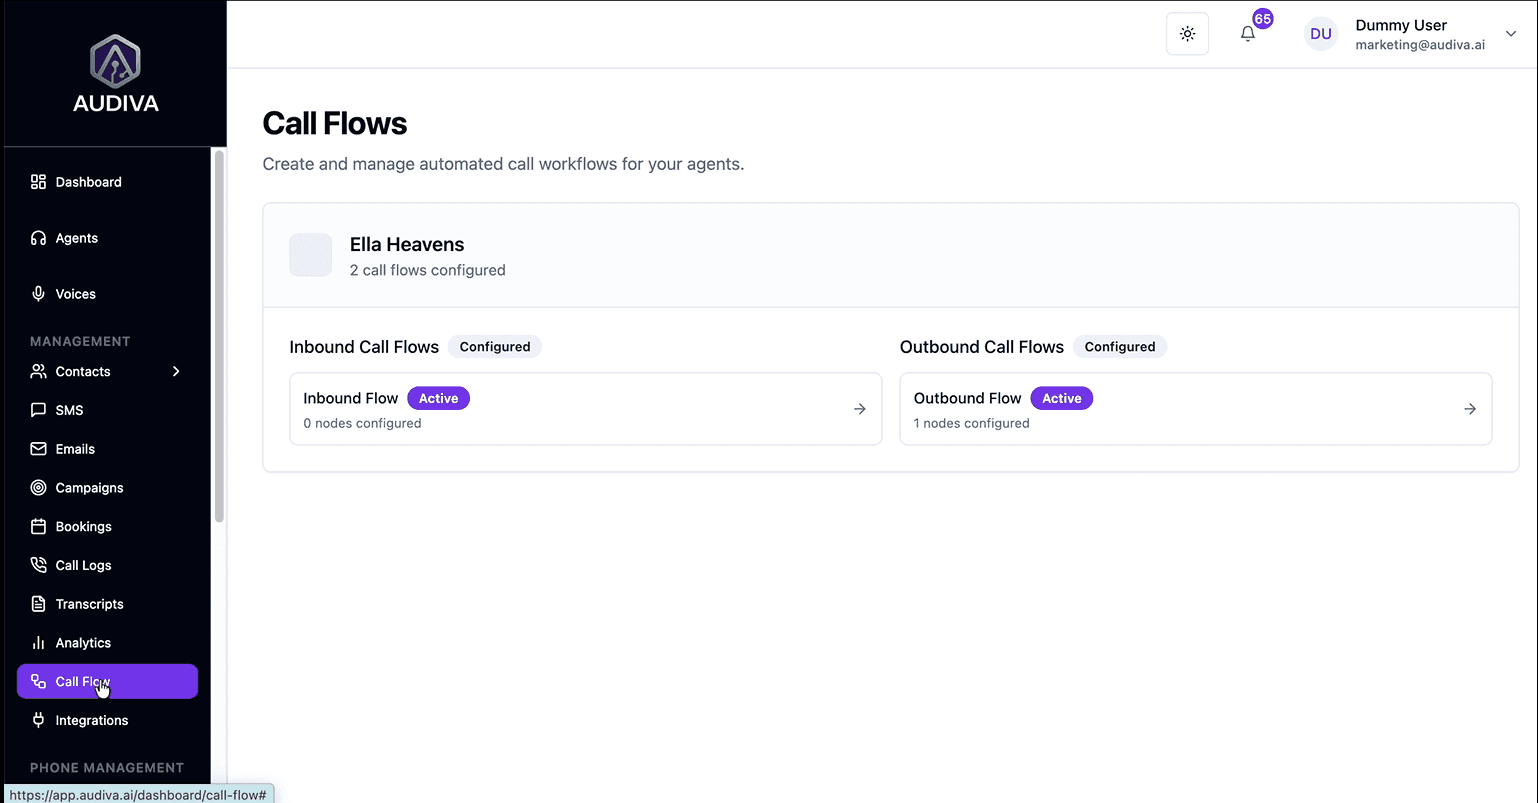
Think of each flow as the script your AI agent follows, but instead of rigid lines, it's a dynamic decision tree that adapts based on what the caller says in real time.
Step 02: Choosing the Right Flow Type (Inbound vs. Outbound)
Before building anything, it's important to understand the distinction between the two flow types, they serve fundamentally different purposes and should be designed accordingly.
A- Inbound Call Flow
Inbound flows handle calls that come to you, prospects calling your business number, existing customers with queries, or anyone who initiates contact. Your inbound flow is your AI receptionist: it greets callers, identifies their intent, asks qualifying questions, and routes them to the right outcome (a booking, a transfer, or a follow-up).
B- Outbound Call Flow
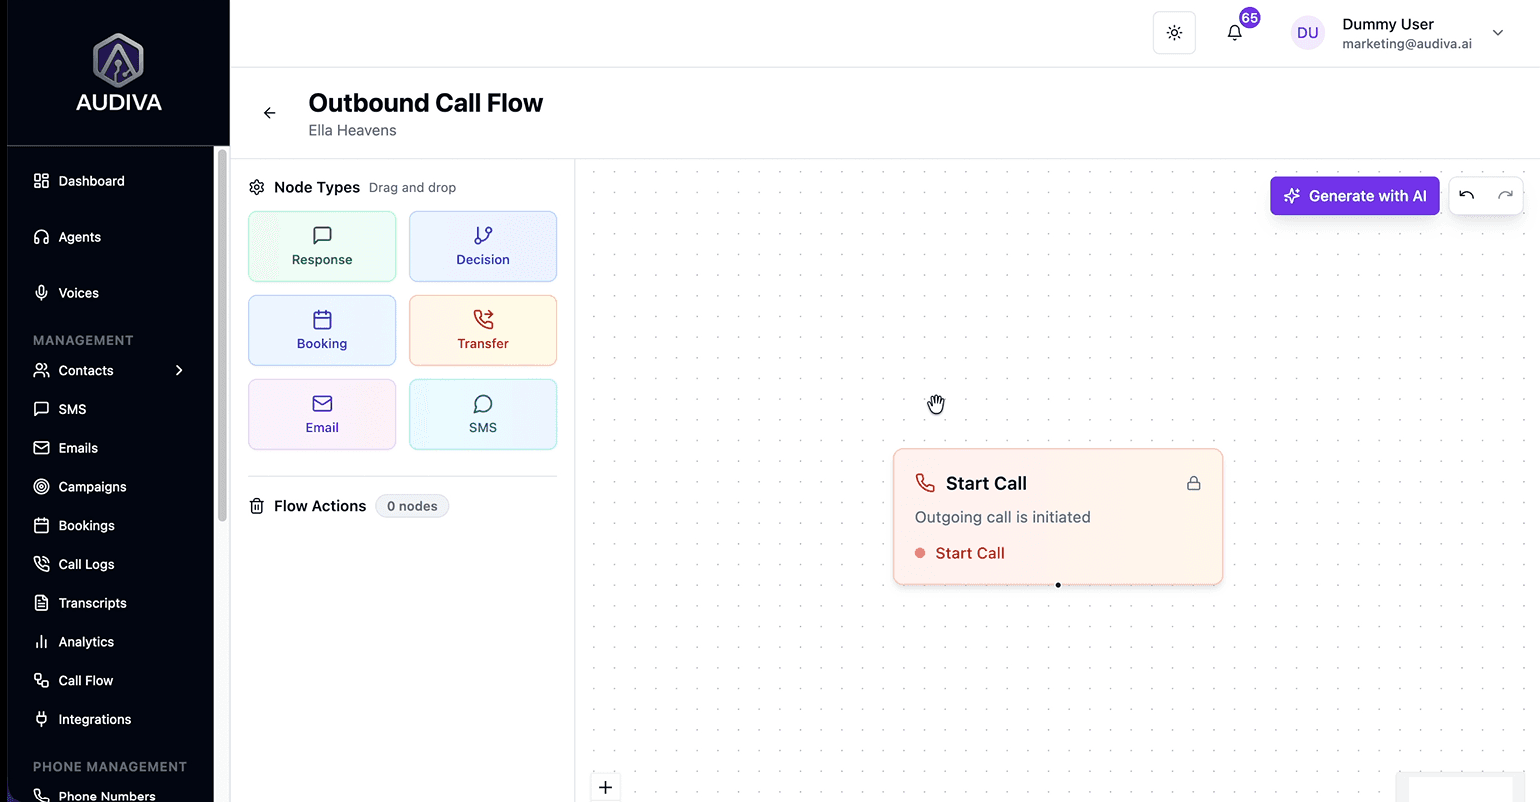
Outbound flows are for proactive campaigns, your AI agent placing calls to leads, following up on inquiries, re-engaging lapsed customers, or confirming upcoming appointments. The outbound flow starts with a Start Call node, which triggers when the campaign dials out, and then follows the same branching logic as an inbound flow from that point on.
The Outbound Call Flow builder
Starting with the "Start Call" trigger node, from which the full conversation logic branches out. A well-configured outbound flow for a digital marketing agency might qualify new leads, ask about their specific service interest (SEO vs. Paid Media), confirm budget, then book a discovery call, all without a human touching the phone.
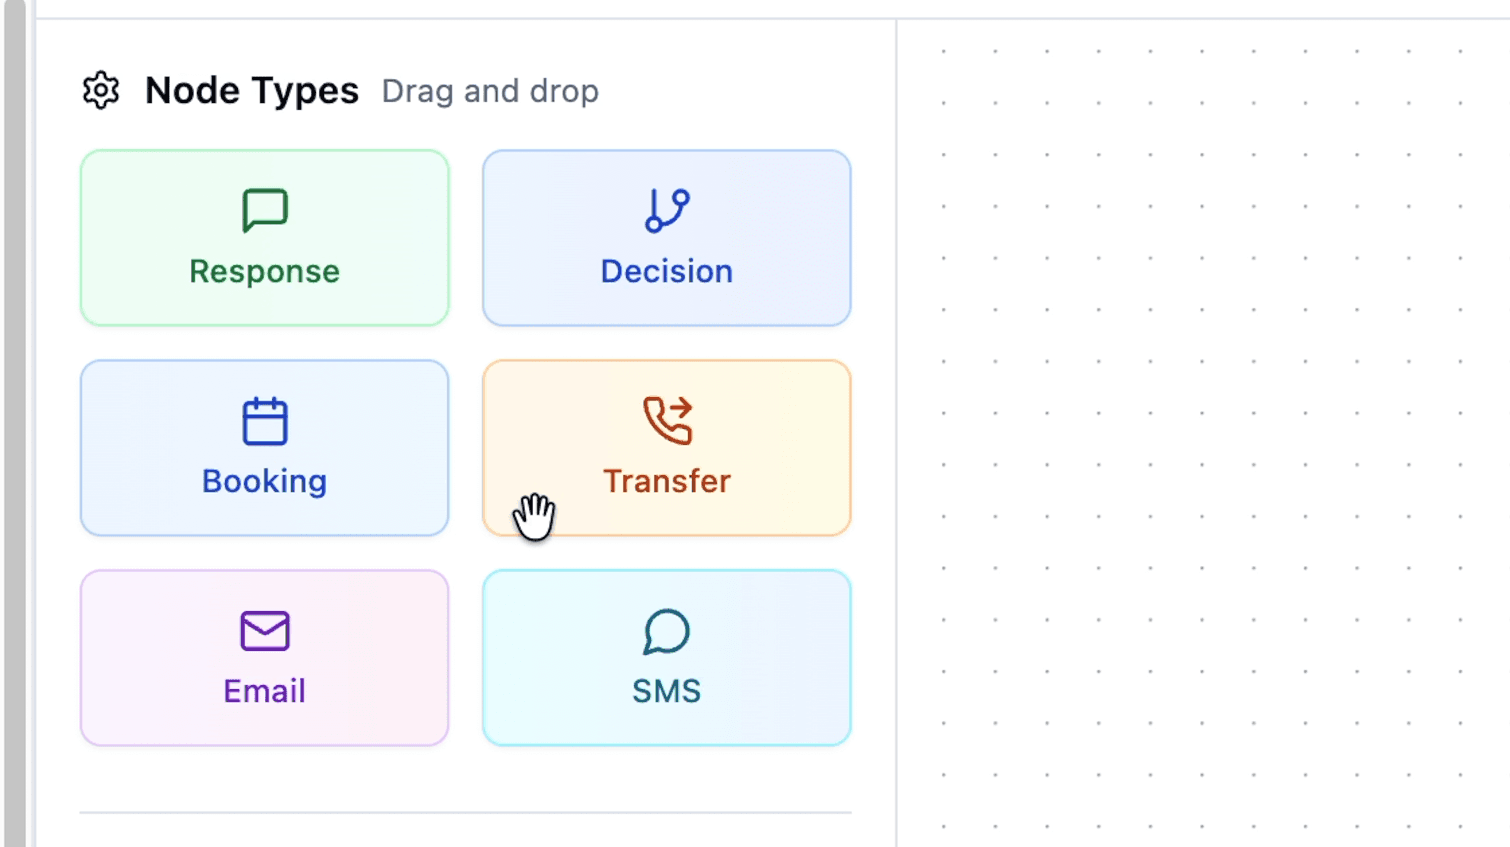
Step 03: Understanding the Six Node Types
Every call flow is assembled from six fundamental building blocks, each color-coded in the Audiva builder for quick identification. Here's what each node does and when to use it
Response
The AI speaks. Use this for greetings, confirmations, and any point where the agent delivers information without branching.
Decision
Branching logic. The agent asks a question and routes the call differently based on the caller's intent or answer.
Booking
Checks calendar availability and locks in an appointment. Connects directly to Google Calendar or Calendly.
Transfer
Hands the call off to a live human agent at a specified phone number. Essential for high-value or complex inquiries.
Email
Triggers an automated email; either a confirmation to the prospect or an internal brief to your sales team.
SMS
Fires an automated text message. Use for booking confirmations, reminders, or follow-up links.
In the Node Types panel, all six building blocks are available to drag and drop into your flow canvas.
Generating a Flow with AI: The Fast Path
For most users, the fastest way to build a production-ready call flow is the "Generate with AI" button located in the top-right corner of the flow builder.
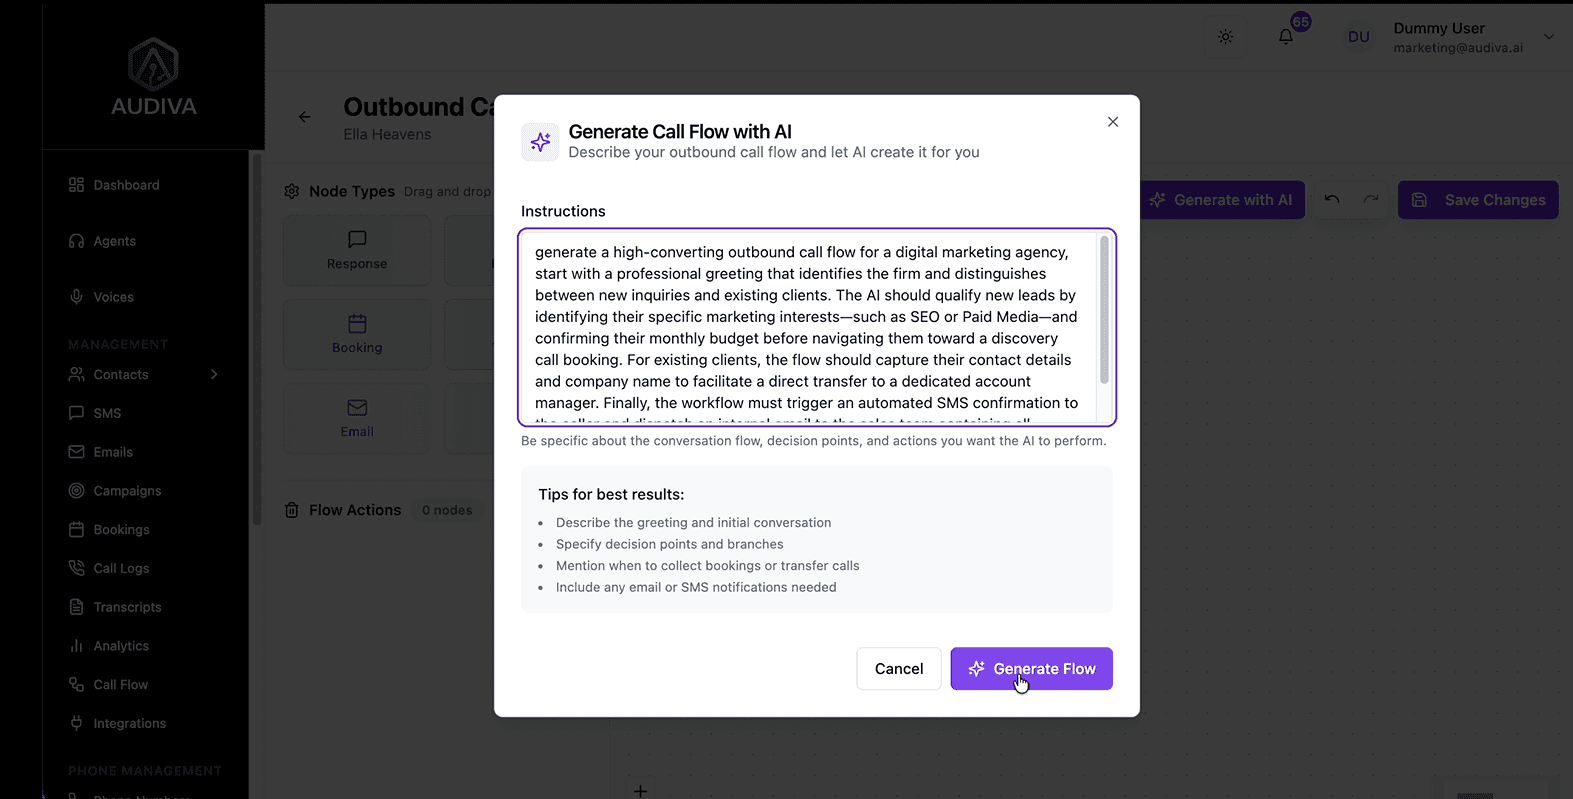
The "Generate Call Flow with AI" dialog describes your outbound process in detail and click Generate Flow.

This turns a plain-language description of your business process into a fully structured node map, complete with greetings, decision branches, booking nodes, and follow-up actions.
The key to a high-quality generated flow is the quality of your instructions. Below is an example of the kind of detailed prompt that produces a comprehensive, multi-branch outbound flow:
“Generate a high-converting outbound call flow for a digital marketing agency. Start with a professional greeting that identifies the firm and distinguishes between new inquiries and existing clients. The AI should qualify new leads by identifying their specific marketing interests, such as SEO or Paid Media, and confirming their monthly budget before navigating them toward a discovery call booking. For existing clients, the flow should capture their contact details and company name to facilitate a direct transfer to a dedicated account manager. Finally, the workflow must trigger an automated SMS confirmation to prospects once a booking is made.”
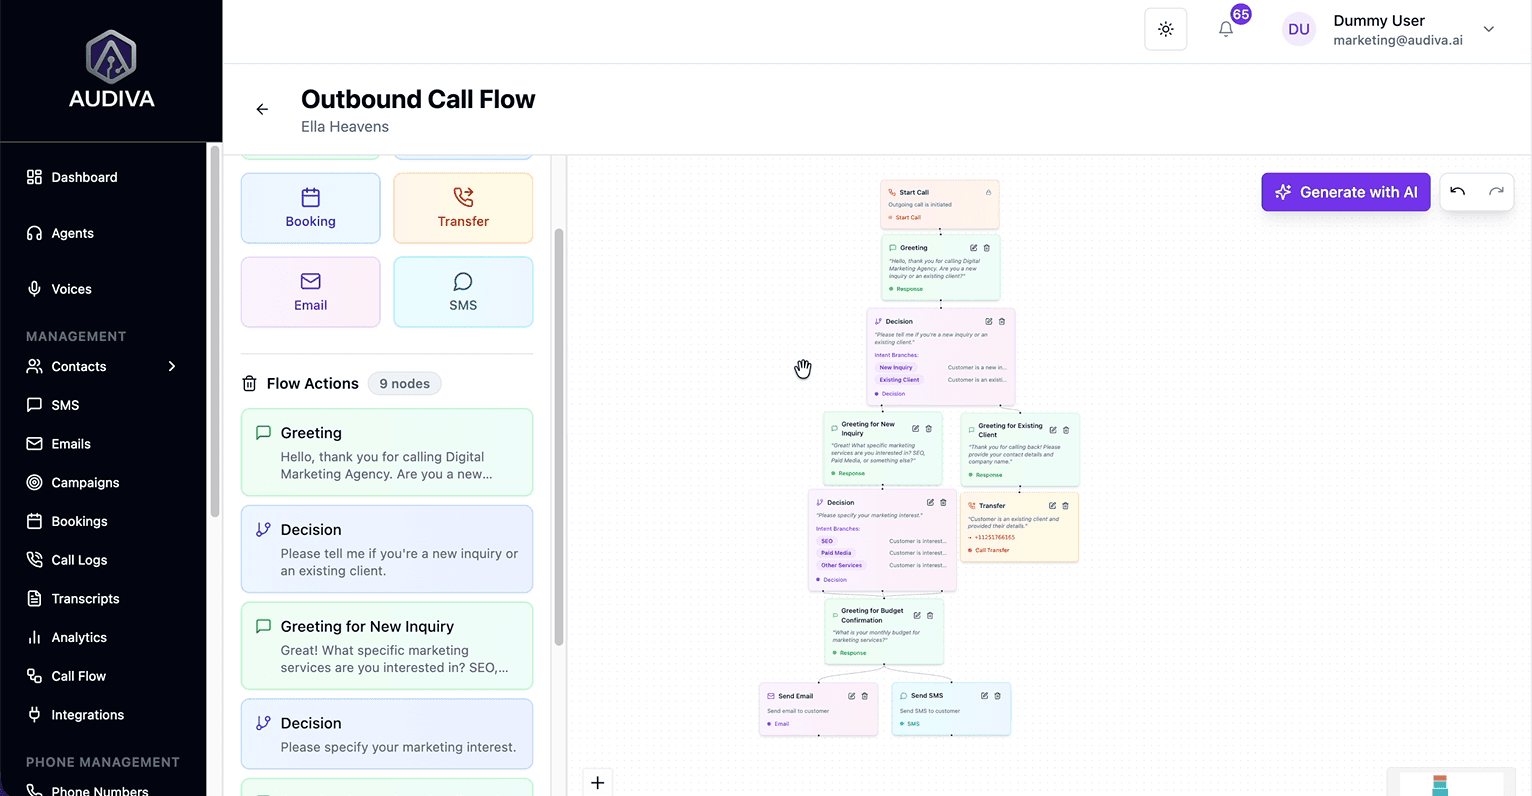
The AI processes this description and generates the complete flow skeleton, including a Start Call node, a greeting Response node, a Decision node with "New Inquiry" and "Existing Client" branches, qualification sub-flows, a Booking node, a Transfer node, and an SMS node. In seconds, what would take hours to build manually is ready for review.
The AI-generated outbound flow — 9 nodes automatically created, including branching paths for new and existing clients.
Reviewing the Generated Flow Structure
Once generated, the flow appears as a visual map on the canvas and in the Flow Actions panel on the left as a scrollable list of nodes in order. This dual view lets you navigate complex flows with ease: click any node in the list to jump directly to it on the canvas.
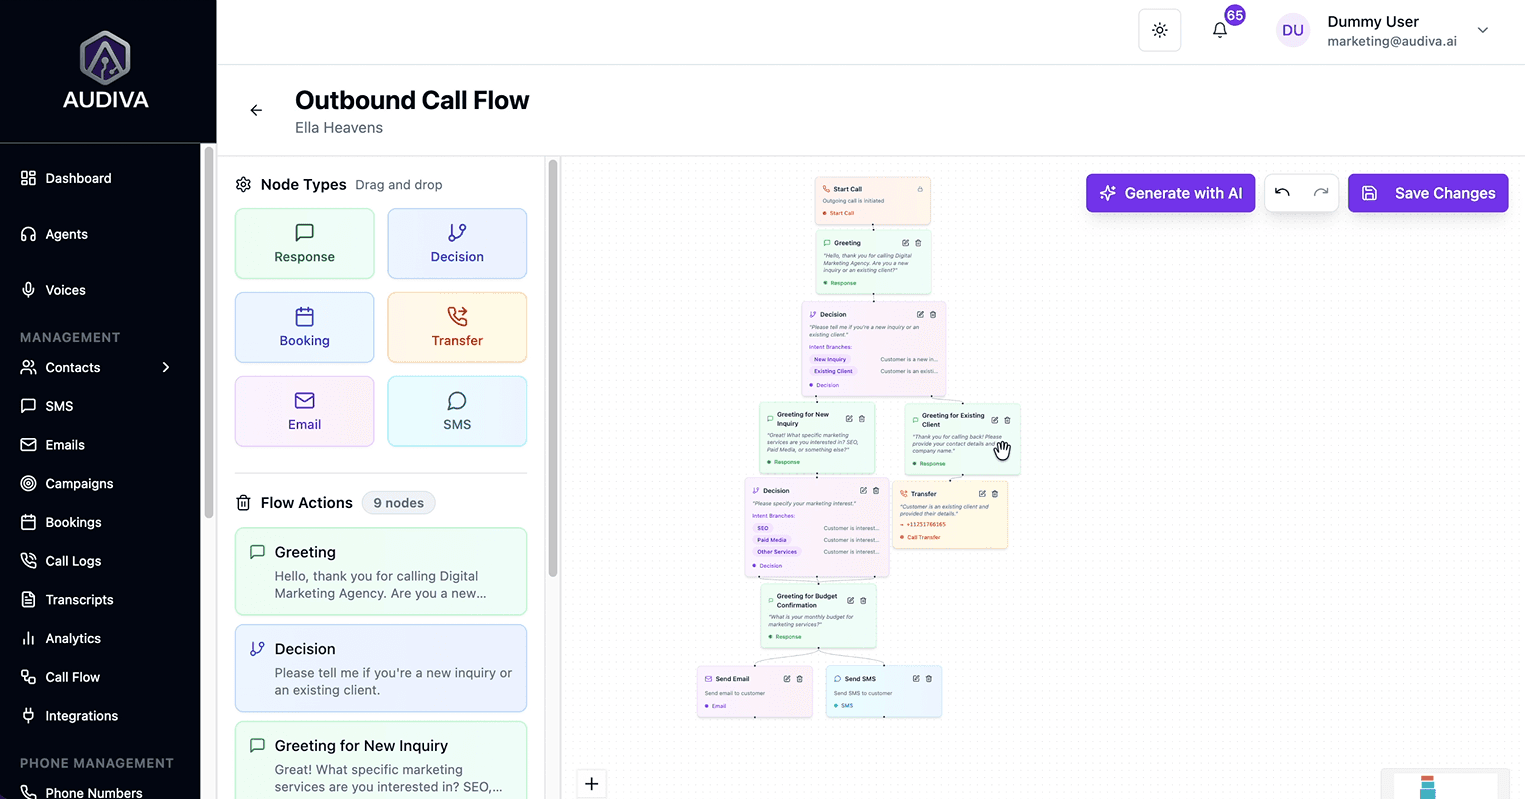
The complete generated outbound flow on canvas, branching paths for new inquiries and existing clients, are clearly visualized.
Customizing Nodes and Deploying Your Flow
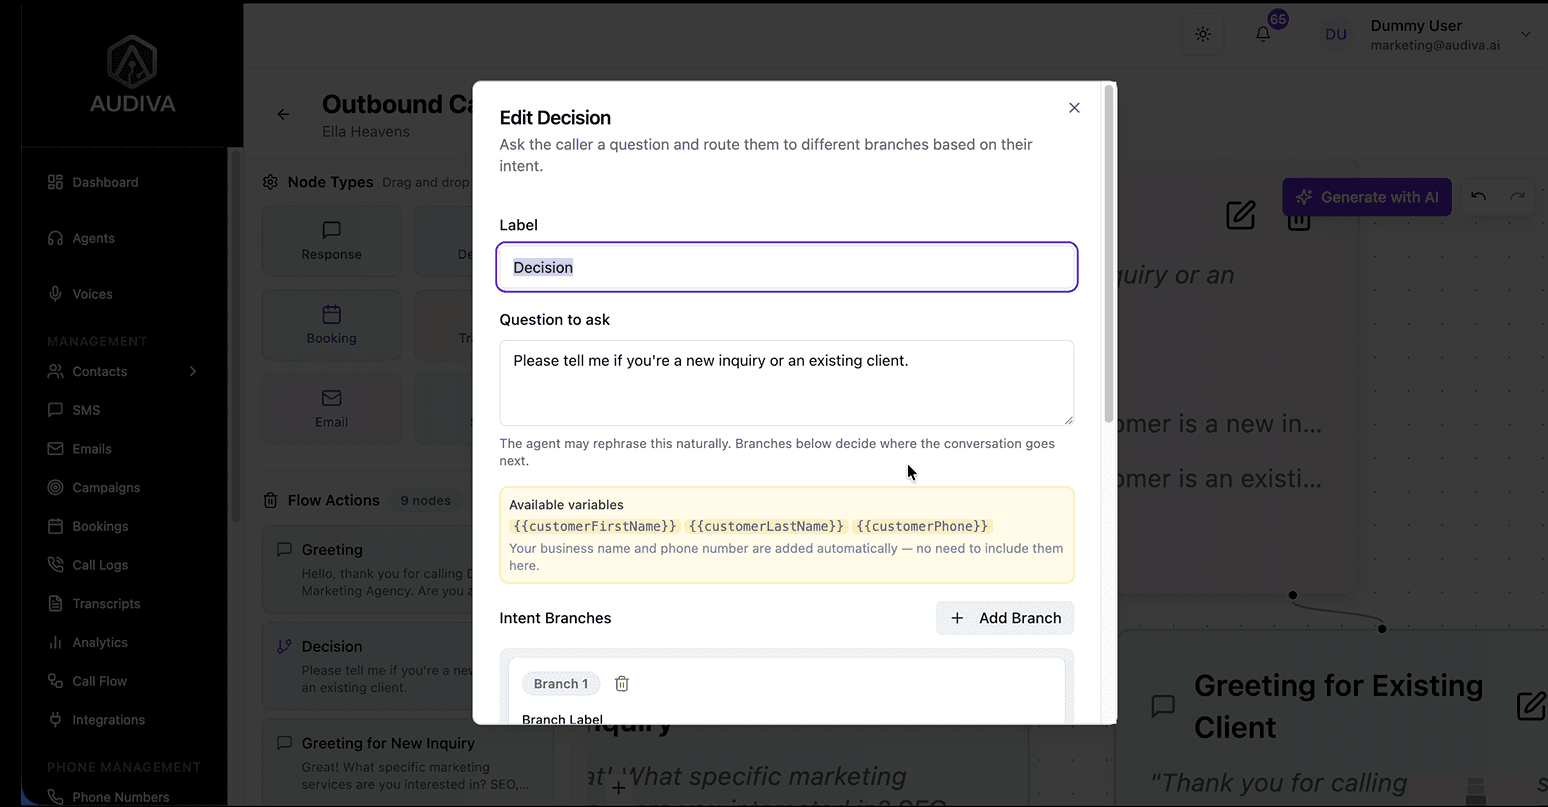
AI generation gets you to a strong starting point, but manual customization is where you tailor the flow to your exact business voice and rules. Click any node on the canvas to open its edit modal. For Response and Decision nodes, you can rewrite the exact script the agent uses. For Booking nodes, you can specify the calendar integration, meeting duration, and available windows. For Transfer nodes, you enter the specific phone number where calls should be routed.
**Advanced users can add additional decision branches, insert new nodes between existing ones, or restructure the flow entirely, the visual canvas makes reordering intuitive without touching any code.
Saving and Going Live
Once you're satisfied with the flow, click the "Save Changes" button in the top-right corner of the builder. This immediately deploys the flow; the next call your agent handles will follow the updated logic. There's no staging environment to navigate; saving is deploying.
Both inbound and outbound flows operate independently and can be updated at any time without affecting each other. You can run campaigns with the outbound flow while your inbound flow handles incoming calls simultaneously.
How to Setup Call Flow in Auidva.ai?
Frequently Asked Questions
What is a Decision node in Audiva AI?
A Decision node asks the caller a question and uses their response to determine which branch of the conversation to follow next. The AI detects intent naturally; it doesn't require the caller to say an exact keyword, and routes them dynamically based on the meaning of their answer.
Can I transfer an AI call to a human agent?
Yes. The Transfer node hands the live call to a human by dialing a phone number you specify. This is ideal for high-value prospects, complex queries, or any scenario where a human touch is essential. The transfer happens seamlessly mid-conversation.
Is a complex call flow always necessary?
Not always. While the builder supports detailed multi-branch logic, an agent with a strong knowledge base and a simpler flow often delivers excellent results. Start with the essentials: greeting, qualification, booking, and expand the flow based on what you observe in real call transcripts.
How do I deploy my new call flow?
Once your flow is refined, click the "Save Changes" button in the top-right corner of the builder. This immediately deploys the flow for live operation, no additional steps required.
About The Author

Ibrahim
CEO/Founder


Background Story


Related Articles

features/24 7 Availability
Why Businesses That Answer First Win More Customers
Answer every call, day or night. Learn how AI call handling helps businesses respond faster, capture more leads, and convert more customers 24/7.
Ibrahim

features/24 7 Availability
The Hidden Cost of Missed Business Calls for a Business
Missed calls may cause significant revenue loss for a business. Thus, an AI receptionist is a must to handle all these missed calls with 24/7 automation to capture every lead.
Ibrahim

Ready to See Audiva in Action?
Reading about AI receptionists is one thing. Hearing one handle a real call is something else.


